First Impressions from a Working Camera
by John Henshall
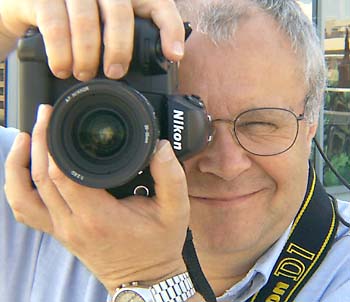
John
Henshall with the Nikon D1 professional digital SLR
at Seybold San Francisco, August 28, 1999.
(Picture
by Iain Brown)
We first heard about it in February 1999, the first production models are expected around the end of October, and I had the pleasure of using an engineering prototype Nikon D1 for a week, before, during and after my Digital Photography Special Interest Day for Seybold San Francisco on August 30, 1999.Hands-on
Nikon Incorporated were understandably reluctant to ship the camera to my hotel, so I collected it from their west coast agent, Mike Phillips. Mike spent over an hour going through the camera's functions in great detail, impressing me by his in-depth knowledge of this new product. Soon I was on my own with the first D1 to be seen outside the care of a Nikon keeper. Keen to test the D1 in the field I when out around San Francisco on Saturday August 28. Here are some of the images I captured.
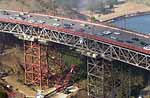
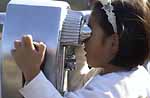
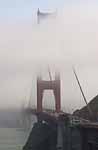
Golden Gate Bridge Steelwork Moscone Centre Girl with Binoculars
Golden Gate Bridge SF Buildings Flags Valerie The first thing you notice about the D1 is its similarity to the F5 in size, weight and balance. If you use an F5 you will immediately feel at home with the D1. There are only a few new things to learn.
To make an exposure, first set the image quality to 'Hi' (save uncompressed as a TIFF), 'Fine', 'Normal' or 'Basic' (save as a JPEG with increasing amounts of compression &endash; 4:1, 8:1 or 16:1 respectively). I had 48MB Lexar and SanDisk CompactFlash™ cards which would only hold half a dozen uncompressed images. A quick test convinced me that the JPEG 'Fine' setting would suit me fine and almost all the photographs I made (all the ones you'll find here) were at this setting. The JPEG compression reduced the images from 7.5MB to around 1.3MB or slightly less, depending upon picture content. It was unnoticeable in my images.
Pushing it
The sensitivity is set by holding down the ISO button and turning the main command dial. Settings of ISO200, 400, 800 and 1600 are possible in this way, though you can push this to ISO3200 and ISO 6400 using Custom Settings. More about Custom Settings later.
Inside San Francisco's Moscone Center the light is straight down and harsh. During Tadashi Nakayama's presentation about the D1 at my digital photography day I set the camera to ISO1600, images quality to 'Fine' and let it take care of the white balance. After opening the images in Photoshop, the first thing I did was check that I really had set the camera to IS01600, because the noise was minimal. It was indeed on 1600. Quite incredible.
Tadashi Nakayama
IS01600 auto white balanceTiburon street at night
ISO800 tungsten white balanceTiburon street at night
ISO6400 daylight white balance
Custom settings
Advance can be set to 'S' (Single frame) or 'C' (Continuous). With 'S' selected, I stalked a seagull using a 35mm lens. The bird took off as I pressed the button, so I quickly pressed again. Nothing happened. Shot missed. Lesson One: In 'S' mode you cannot take another shot until the previous one has been processed and saved. In 'C' mode you can take up to twenty one shots at a rate of 4.5fps. It takes a very light touch to make just one exposure but this is a good example of where Custom Settings can be useful: the Frame Advance Rate may be set to 4.5, 3, 2 or 1 fps and the Buffer Size may be set to hold anything from 1 to 21 shots in 'C'mode. In all, there are more than thirty Custom Setting menus, accessed by holding down the 'CSM' button and rotating the main command dial. There are options for just about everything you can think of -- and maybe a lot of things you can't. Options within each item are set using the sub-command dial. All settings are made numerically, for example '16-20' sets a twenty second self-timer delay, '14-10' assigns the greatest weight of Centre-Weighted Metering to a 10mm circle. Edge Enhancement may be set to raise or lower the amount of sharpening applied to an image -- see the bottom of the next page. The slight disadvantage is that, because there are so many, you need to carry a 'crib' card handy -- to know what the menu numbers relate to.
23-0 'Normal' (default) 23-1 Blur edges 23-2 Sharpen edges 23-3 No enhancement All these features make the D1 very versatile, endlessly configurable and a real pleasure to use. My only slight regret is about the delays experienced when flicking through images in replay mode and bringing them up to full resolution. Other cameras have spoiled us by doing this instantly. There is room for some improvement here.
Overall, the Nikon D1 is a most carefully thought out product, all the more remarkable as the first solo digital SLR from Nikon. The images I captured are of remarkable quality. In the UK, the camera is already being advertised at just over £3,000 -- an amazing price, especially when you bear in mind that you'll spend nothing more on film or processing. The D1 will make digital imaging accessible to a much wider range of photographers and may well have a profound effect on the world of digital imaging. It deserves to be highly successful.


Nikon Corporation Japan
Nikon UK Ltd
Nikon Inc USA
Any further news and views? Let us know.
Our digital camera index of past and present products
This
article first appeared as "John Henshall's Chip Shop" in
"The Photographer" magazine, October 1999.
IMPORTANT NOTICE
This document is Copyright © 1999 John Henshall. All
rights
reserved.
This material may only be downloaded for personal
non-commercial use. Please safeguard the future of online
publishing by respecting this copyright and the rights of
all other authors of material on the Internet.
v.990630
![]()
![]()